
The four parts
| Component | Role in line | Failure signal |
|---|---|---|
| Water | Hydrates tilled soil via pumps and spouts | Dry soil halts crop growth and leaves harvesters spinning empty |
| Crop | Grows on a repeating cycle to supply sale goods | Insufficient seeds per harvester leaves machine capacity idle |
| Harvester | Automatically collects mature crops on its tile | Misplaced facing dumps collected crops onto the ground |
| Conveyor and chest | Transports and stores collected inventory | Full storage forces items to stack on belts and stall the line |
Water: pump, spout and the pre-filled pool
- Dig a water basin directly under the footprint of your planned crop field.
- Fill the basin with water before placing any machinery above it. Pre-filling ensures water lines activate immediately once connected.
- Mount the water pump on the water source block.
- Fasten spouts to each farming level that requires moisture.
- Inspect the tilled soil for one full growth cycle. You know water is flowing when dirt blocks darken and stay hydrated.
| Soil state | Visible appearance | Production impact |
|---|---|---|
| Hydrated soil | Dark brown earth block | Crops mature continuously and harvesters collect on schedule |
| Dry soil | Light, cracked earth block | Crops stop growing and harvesters cycle empty with zero output |
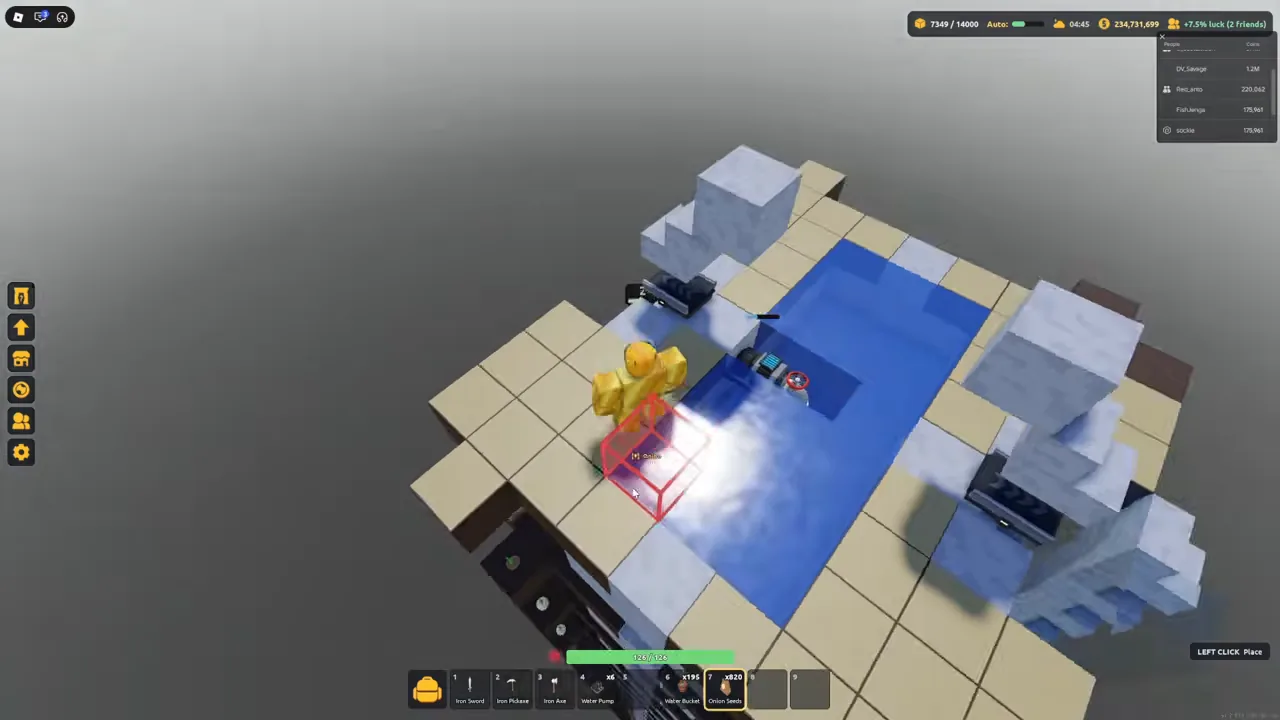
The frame below is the pump step in that pump build: the pump sits on the water block and the spout is attached to it, with the planting layer and the collection edge already laid out around it. It shows the water part only, so use it to check placement, not to copy a whole layout.
Layer spacing
In God4giveMe's recorded crop farm build, the design leaves three open air blocks between levels, creating a four-block distance from floor to floor. Each level contains four separate planting zones of twelve slots, providing 48 seed positions per layer.
This is that build's size, not a game-wide rule. Other farm designs use different footprints and seed counts.
Why the chest matters
Watch out. Full storage stops the entire farm. When a collection chest fills to capacity, freshly harvested crops sit on conveyors. In God4giveMe's recorded iron build, backing up conveyor lines caused lag and reduced machine output. Attach large chests and empty them before storage runs out.
First build order
- Build a single ground layer with working water, soil, harvester, and storage chest.
- Observe one full cycle to verify that harvested crops travel down the conveyor into the chest.
- Duplicate the layout on an upper level only after the first level runs reliably.
- Extend water pump coverage to the new layer using additional spouts.
To specialize in raw vegetable production, adapt this structure into an onion farm. If you want to supply ingots for machinery parts, follow the iron farm guide.